How to Publish an Alpha Anywhere Application to a Remote Server Using FTP
Description
A step-by-step guide to configuring a publishing profile to publish your Alpha Anywhere Application to a server running the Alpha Anywhere Application Server using FTP.
Discussion
This tutorial describes how to create an FTP publishing profile to publish a web application to a remote server running the Alpha Anywhere Classic Application Server.
For publishing an application to the Alpha Anywhere Application Server for IIS, see Publishing to IIS. For Alpha Cloud, see Publishing to Alpha Cloud.
Important Notice for Community Edition Users
This tutorial is for the full Alpha Anywhere Development Environment. Community Edition only supports publishing to Alpha Cloud.
FTP Publishing Requirements
To publish to a remote server using FTP/SFTP publishing, the following conditions must be met:
- The Alpha Anywhere Classic Application Server is installed and running on the remote server.
- The remote server is configured to allow FTP/SFTP.
- An FTP Client (if not using the built-in Alpha Anywhere FTP Client; required if SFTP is desired.)
Configure the Publishing Profile
The Publishing Profile describes where web application files will be published in the Application Server's webroot, either locally or on a remote server. During the publishing process, the project files for the web application are compiled and copied to the webroot for the Application Server. This section describes how to configure a project to publish an application to a server running the Alpha Anywhere Application Server over FTP.
From the Web Projects Control Panel, open the Web menu and select Project Settings... to open the Web Project Profiles dialog.
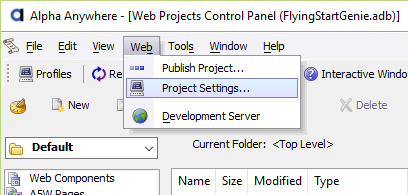 Open the Web Project Profiles dialog.
Click Add New Profile to create a new publishing profile.
 Create a new profile.
Select the ISP/remote profile from the list of profiles listed in the left-hand column. Click Next.
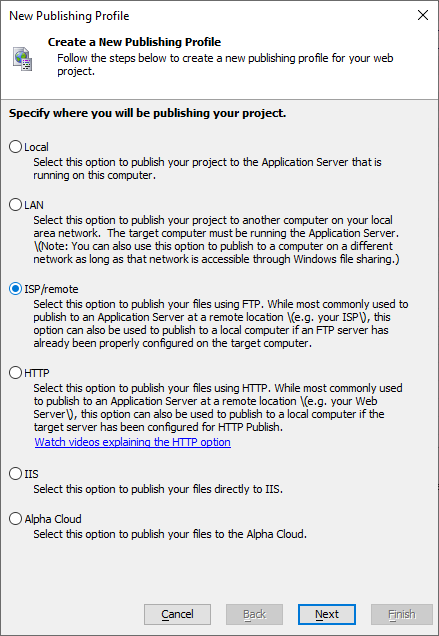 Specifying where you will be publishing your project.
Enter the IP address for the server where you would like to publish your application.
Optionally enter the Username and Password credentials required to FTP to the remote server. If you want to use Alpha Anywhere's built-in FTP publishing, Username and Password are required. Use the Test FTP Login button to verify the credentials are correct.
Click Next.
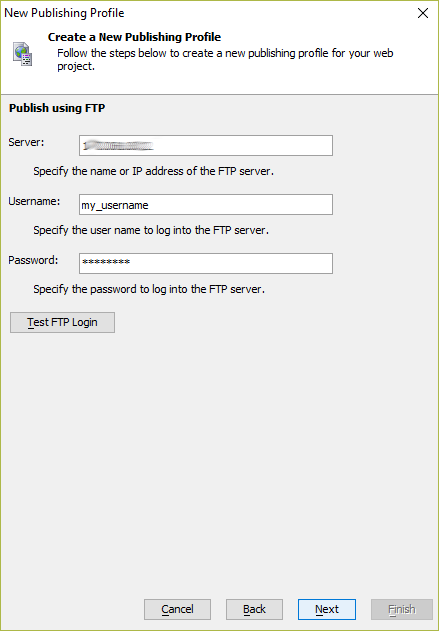 Enter the Server, Username, and Password required to FTP files to the remote server.
Define the name of the Web folder on the remote server where the webroot of the application will be uploaded.
If the web application includes DBF files or other files that need to be stored in a data folder external to the webroot, define the name of the folder in the Data folder property.
If the application has a data folder, define the full path to the data folder in the Server Folder properties. This path is the absolute path that the [PathAlias.ADB_Path] alias will resolve to when decoded. You can add or modify this value later in the Aliases settings for the publishing profile.
When you are done, click Next
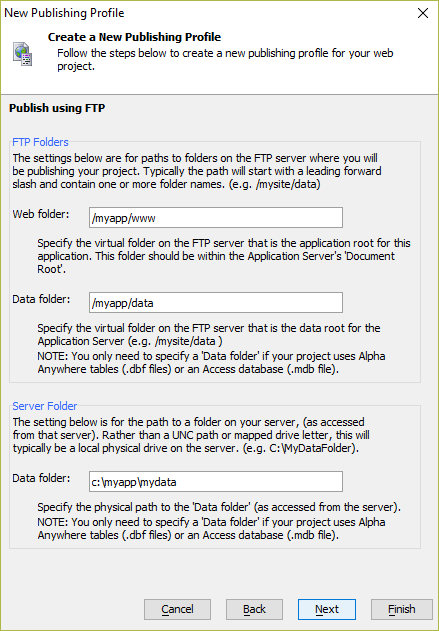 Define the Web and Data folder names for the remote server.
Enter Publish details. These settings are optional and are not required to complete the publishing profile. They are defaults that will be used to populate the Publish Web Project dialog.
Enter the Base URL and default Startup page. These settings will be used to auto-launch the browse to view the published web application if you choose to launch the browser when publishing is complete.
If your project includes data files, check Publish data files and select the data files to publish by clicking the Select Files to Publish button.
If your project includes Reports defined in the Control Panel (the Control Panel is separate from the Web Projects Control Panel), check Publish library Files.
Click Finish to create the profile.
 Specify the Base URL, startup page, and any additional publishing information, such as data files or library files, that is needed.Prefer to define reports in the Web Project Control Panel. Reports defined in the web project have the .a5rpt extension.
When prompted, enter a name for the profile. Choose a name that identifies this profile as a publishing profile to the remote server.
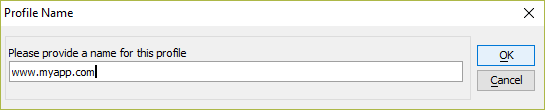 Name the remote publishing profile.
Next, you need to configure the FTP Program used to publish the project to the remote server as well as any Aliases, Alpha DAO connection strings, Named Resource Providers, and Web Socket Settings that are required by the web application. Let's start with the FTP Option to use when publishing to the remote server.
Select the remote publishing profile you just created.
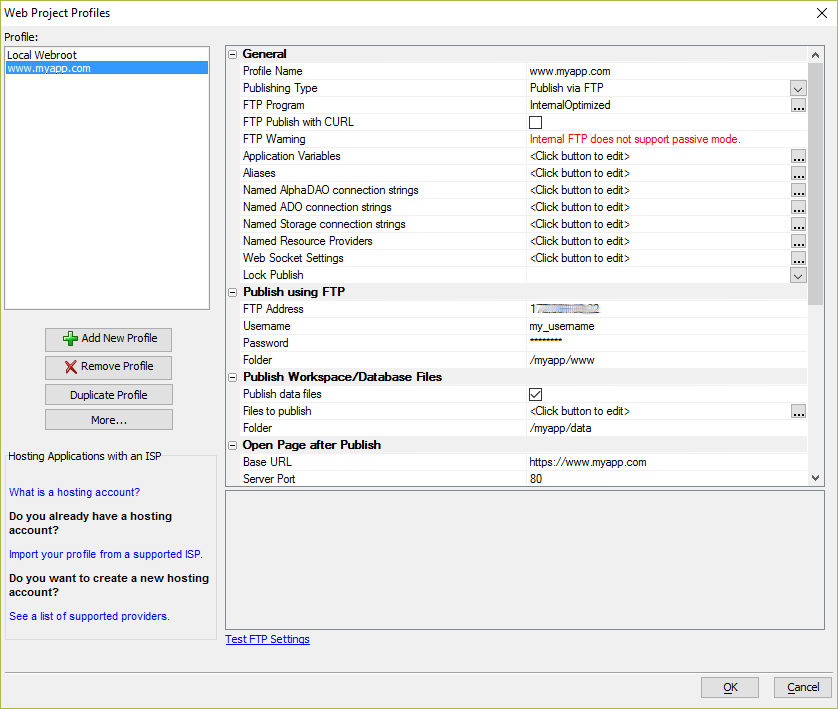 Select the remote publishing profile in the Web Project Profiles dialog.
By default, FTP Program is configured to use InternalOptimized. InternalOptimized zips all of the files to be published into a single archive and uploads the files to the remote server using the built-in FTP program. Once uploaded, Alpha Anywhere extracts the files on the remote server to the appropriate location(s). Because the files are zipped, the publish is very quick. This option, however, requires Alpha Anywhere to be running on the remote server when publishing.
You may want to change the publishing behavior if Alpha Anywhere is not running on the remote server. You may also want to change the publishing behavior if your firewall or router blocks the built-in FTP program.
To change the FTP Program behavior, click
 for the FTP Program setting. Choose the desired behavior. Options include disabling optimized publish, using an external FTP client, or prompt at publish time. Choose the desired behavior and click OK.
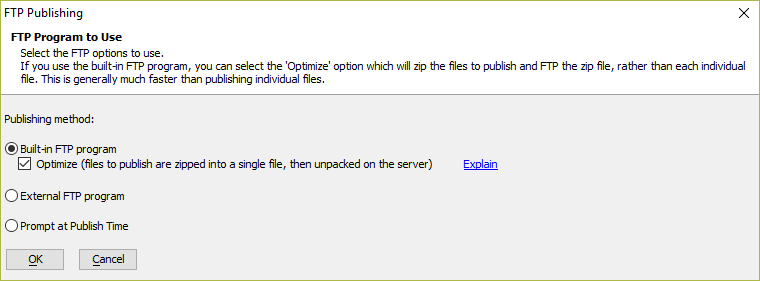 Available FTP Publishing Options.If you choose Prompt at Publish Time, you will be prompted to choose what FTP method (optimized, built-in, or external FTP program) when the application files are published.
Optionally enable FTP Publish with CURL. Uploading with CURL is only available if the built-in FTP program is used. Enabling this option adds additional error checking when using the built-in FTP program, changing the FTP behavior from using ACTIVE mode to PASSIVE mode. Using CURL may slow the FTP upload process.
If you find that publishing fails to complete using the built-in FTP program, try enabling FTP Publish with CURL.
The remote server must be configured to support PASSIVE mode if publishing with CURL is enabled.If your web application uses Aliases for paths and connection strings, you must define the published Aliases that will be used by the web application. Aliases are defined relative to the server file system. Click the
button for Aliases to define the paths relative to the remote server for published Aliases. This is where you can define the [PathAlias.ADB_Path] alias for the data folder.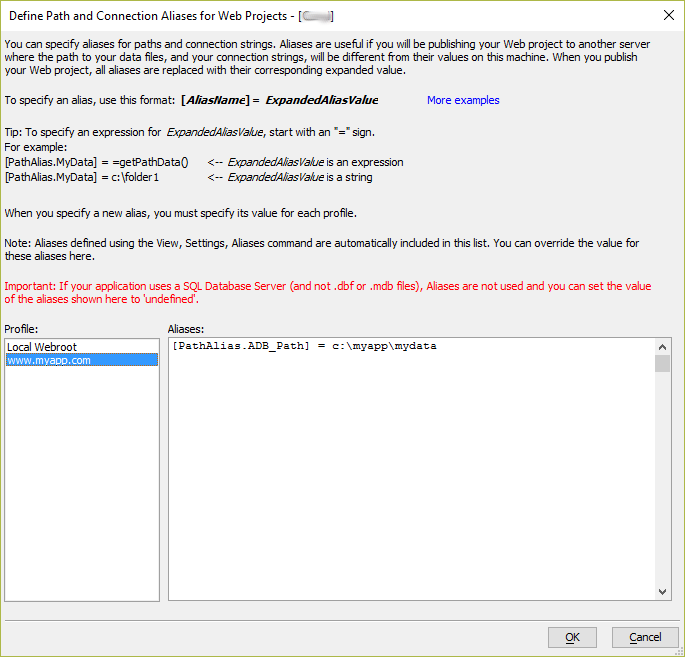 Define Path and Connection Aliases for the Web Project.
If your web application uses any Named Alpha DAO connection strings, you must define the AlphaDAO Connection strings the remote server will use. In a typical development environment, Named AlphaDAO connection strings will reference a database running on the development system. When published, the Named AlphaDAO connection strings must be modified to reference the production database that will be used by the published application. If your application uses DBF databases, the Named AlphaDAO connection strings must reference the published DBF files on the remote server.
Connection strings are defined relative to the remote server. Click the
button for the Named AlphaDAO connection strings property to define the connection strings that will be used by the web application when published to the remote server.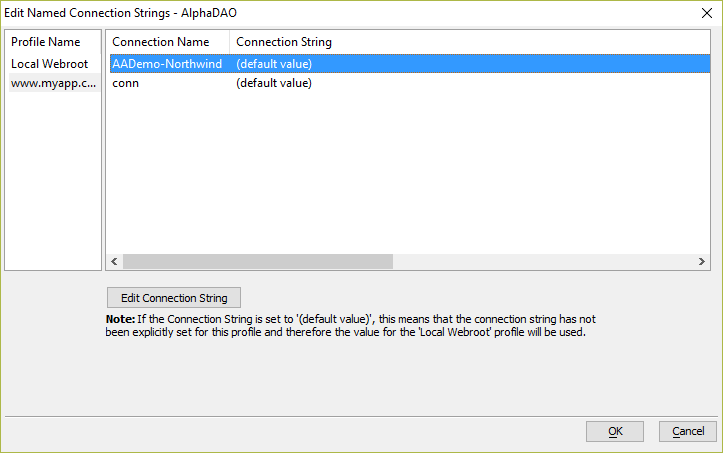 You MUST define the published connection string for any Named AlphaDAO connection strings used by your application.
If your application uses Named Resource Providers, define the Named Resource Providers relative to the remote server. Click the
button for the Named Resource Providers property to define the named resources.If your application uses Web Sockets, configure the Web Socket Setting for the publishing profile. Click the
button for the Web Socket Settings property to define the web socket settings for the remote server.Define or adjust any other settings required in the publishing profile. You can come back to the Web Project Profiles dialog at any time to make adjustments if you find that a setting is missing or incorrect.
Click OK to save your changes and close the Web Project Profiles dialog.
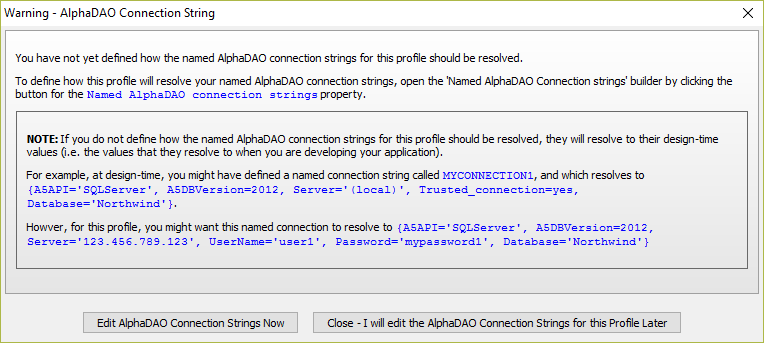
If your application uses Named Alpha DAO connection strings and you did not define the published connection strings in the Publishing Profile, you may see the error message below. Click Edit AlphaDAO Connection Strings Now to define the connection strings for the Named Alpha DAO connection strings used by your application. Your published application may fail to work if you do not define the published connection string for the Named AlphaDAO connection strings.
If your application does not use any of the Named AlphaDAO connection strings to connect to data sources, you can ignore this message.
 Named AlphaDAO connection strings must be defined to reference the production data source in a published application.
Now that you have configured a publishing profile, the next step is to publish your application and open it in a web browser.
Publish Your Application
Alpha Anywhere web applications are deployed using the  Publish Web Project dialog. Applications can be published locally on your development machine or to a remote server. In addition to deploying your project, publishing is also a useful tool for testing your application. Testing can be done locally on the development machine or on a remote server. The following instructions explain how to publish to the remote server using the publishing profile you just created.
From the Web Projects Control Panel, click
Publish on the toolbar.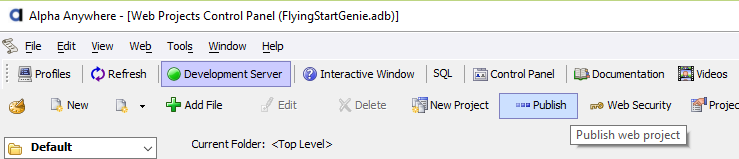
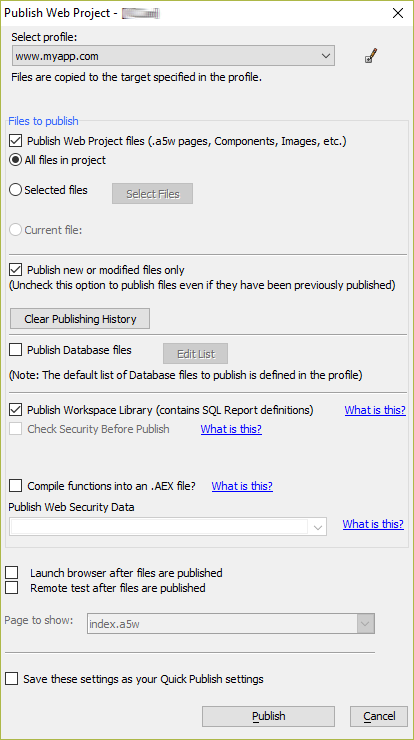
The Publish Web Project dialog is used to configure what is published to the destination defined by the publishing profile.
Select the publishing profile you created from the Select profile dropdown. Select the All files in project option to publish all files in the project. Check the boxes for Publish Web Project files and Publish new or modified files only.
If your application uses Reports defined in the Control Panel - not as separate .a5rpt files - check the box for Publish Workspace Library (contains SQL Report definitions).
If your application has functions defined on the Control Panel (this is separate from the Web Projects Control Panel, check the box for Compile functions into an .AEX file?.
 Publish Web Project settings
If your application uses Web Security, publish the Web Security files. Select Publish Data Tables -- Publish security tables. from the Publish Web Security Data dropdown box.
You only need to publish the Web Security tables once to your server. Once the tables have been published, choose Ignore -- Do not publish security data. on subsequent publishes to the remote server.If the remote server is a testing server to which you will be making frequent changes, optionally check Save these settings as your Quick Publish settings. You can Quick Publish your project by clicking the Quick publish project link below the left column on the Web Projects Control Panel.
 Quickly publish a project using the Quick Publish project link on the Web Projects Control Panel in the left-hand column.
Click the Publish button to being publishing the web project to the remote server.
Alpha Anywhere will display the list of files to publish in the Files to be Published dialog. This dialog is for informational purposes only. While you can edit the text in the dialog, it does not change the files published to the remote server.
Click OK to continue.
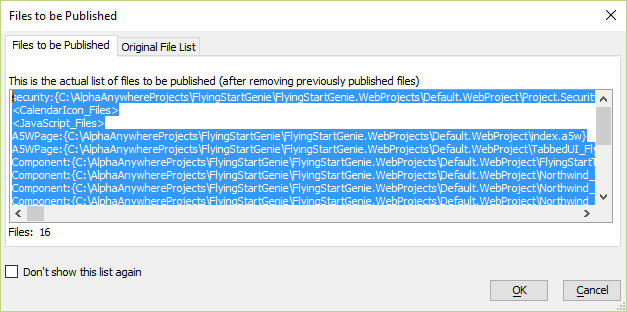 List of files to be published
If you chose Prompt at Publish, you will be asked what publishing option you would like to use. Choose the Publishing method to use and click OK.
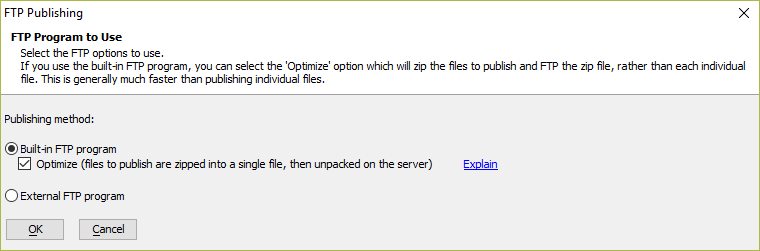 Prompt asking what FTP Program to Use
If you chose to use Alpha Anywhere's internal FTP publishing option, Alpha Anywhere will display a progress dialog while it publishes the files to the remote server. Publishing to a remote server can take some time, especially if you did not use Optimize Publish. Wait for Alpha Anywhere to finish uploading the files to the server.
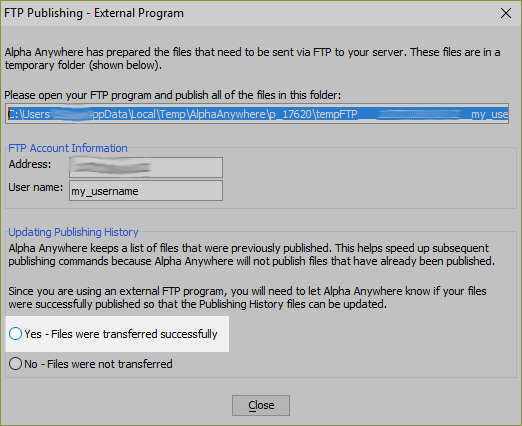
If you chose to publish the files manually, Alpha Anywhere will display a dialog with the path to the files you must upload to the remote server. This is where you will find the files to FTP to the remote server.
Copy the path to the clipboard and paste it into your FTP program of choice. Then, FTP all of the files in the folder to your remote server. If your project has a separate data folder and webroot, the directory will contain two folders - one with the files that belong in the webroot and one with files that belong in the data folder on the remote server.
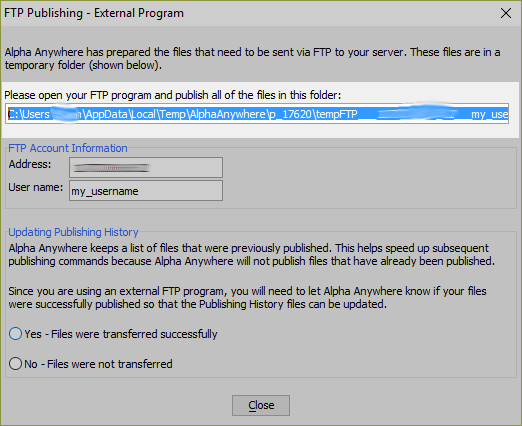 Alpha Anywhere provides the location of the files to FTP to the remote server.
If you have uploaded files to the remote server using an external FTP program, return to Alpha Anywhere to confirm that publishing was successful. Choose Yes - Files were transferred successfully and click Close
 Confirm files were uploaded successfully using an external FTP program.
If prompted to delete temporary files, click Yes. This will delete the temporary files that Alpha Anywhere created during the publishing process.
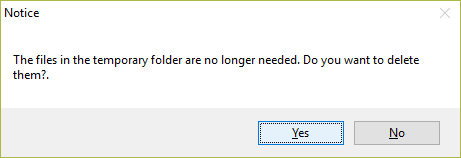 Prompt to delete temporary publishing files.
Alpha Anywhere will display a notice when publishing is complete. Click OK to close the notice.
 Notification that publishing is complete
Troubleshooting
FTP Upload Fails to Update Files
If a file is locked by an application -- because it is in use by the Application Server -- FTP publish may fail to update the file. If FTP/SFTP upload fails to update a file, you can run a simple test to verify whether or not the file is locked:
Create a new FTP Publish profile that publishes to a different folder in the Application Server webroot
Publish your application to the server using the new profile
If the publish succeeds, then it is likely the file(s) are locked on the server and cannot be overwritten. To unlock the file(s), reboot the server. Then, publish your application.
Appendix
Appendix A: Testing Connection Strings on the Server
The Alpha Anywhere Classic Application Server can be used to create and verify the published connection string(s) needed by the application. On the Other tab in the Application Server Settings, the Open the Connection String Builder Genie link opens a dialog that can be used to create and test a connection string on the server to verify the connection string is valid before adding it to the publish profile. To learn more, see How to Test Connection Strings on the Application Server.
Limitations
Full Alpha Anywhere Development Environment Only
See Also